
Rescuing Images from a Broken SD Card
I recently went through a box of electronics that me and my girlfriend Kačka no longer use in the hopes of finding something worth salvaging and stumbled upon her old camera. When asking about why it’s there, she told me that she no longer uses it since “it doesn’t turn on”, which piqued my interest because it could be fun to fix and could contain a lot of awesome pictures from when we were growing up.
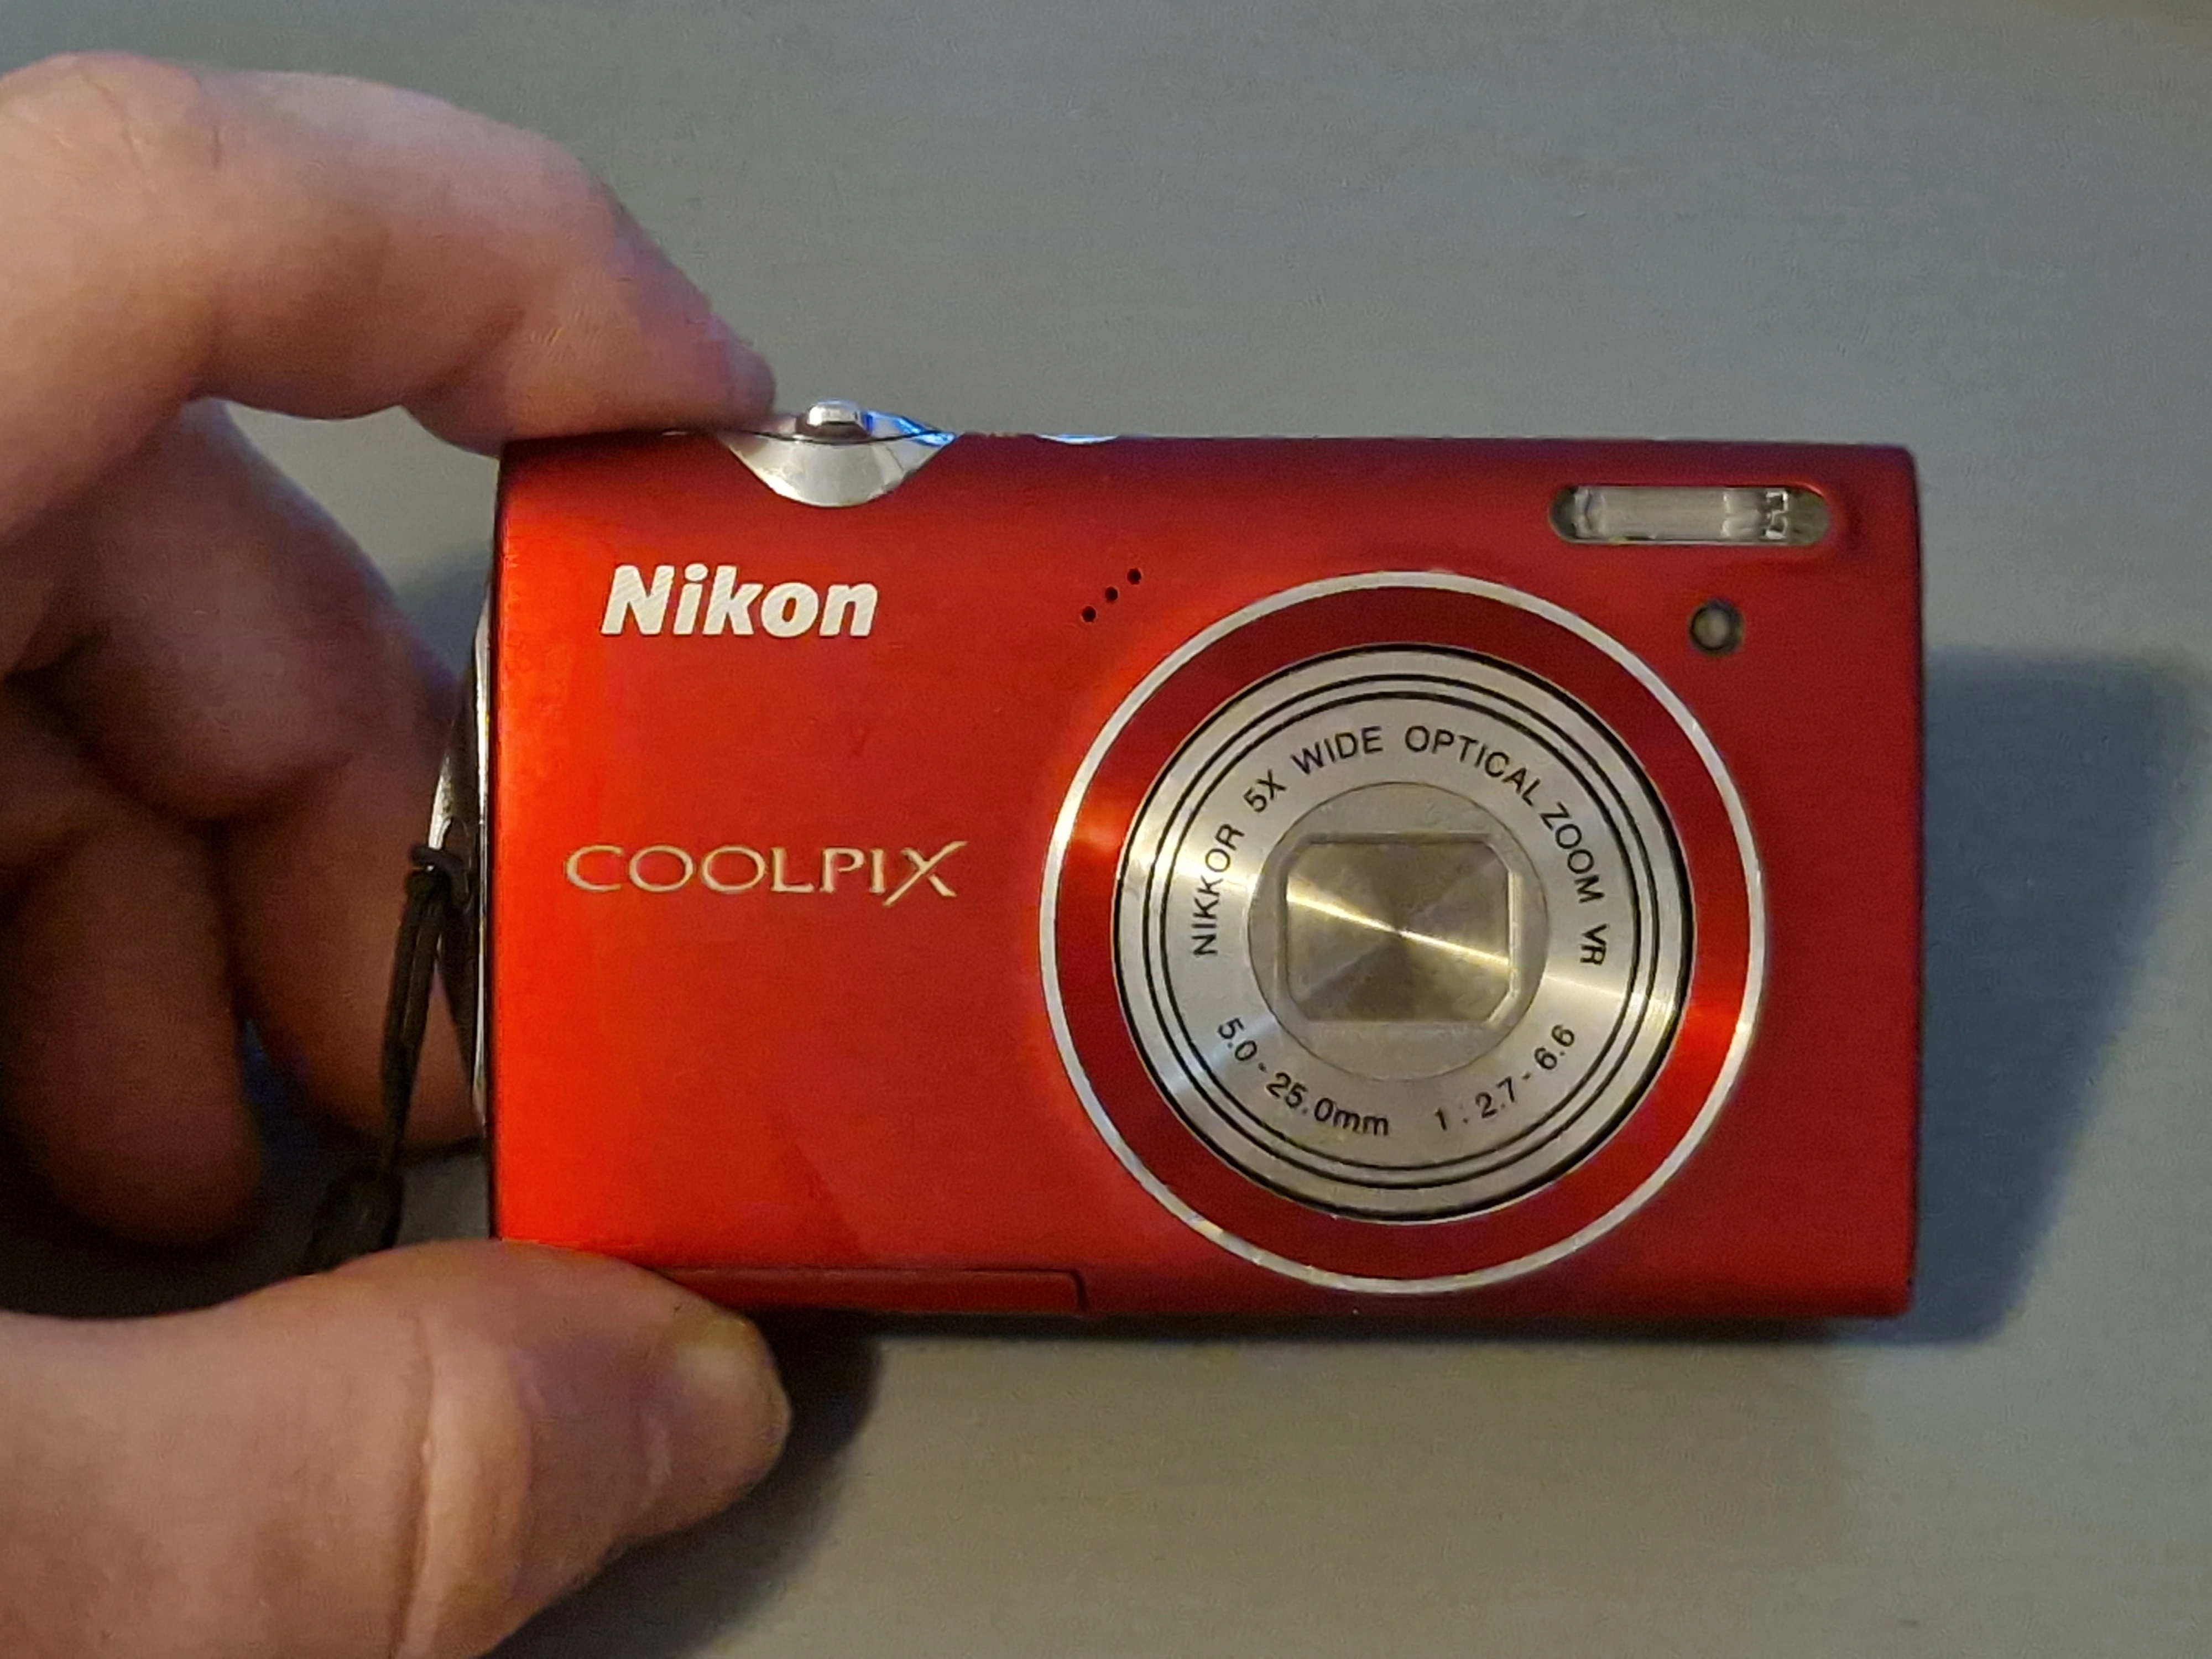
The camera in question is a Nikon Coolpix S5100, which came out in 2010. Since it was used quite extensively and Kačka doesn’t remember when/why it stopped working, there could be a number of things wrong.
Fixing the Camera
The first thing I tried was to plug the USB in and attempt to start the camera, which resulted in some lights flashing but not much more. Thinking it could be an issue with the SD card, I took it out and sure enough, the camera started up without any issues.
Well, that was a relatively easy fix… 🎉?
Reading the SD card?
While the camera itself definitely has some sentimental value, the main target is the data on the card, so let’s see what we can do about recovering it.
The first thing I tried is to plug the SD card in and run lsblk, getting
| |
This is good news since it seems like the card is not entirely dead. Mounting it, however, hangs indefinitely, so it is not entirely alive either.
Luckily, we can use the amazing ddrescue tool, which exists specifically for extracting data from faulty devices such as the one we’re dealing with here.
Unluckily, this process can take a very long time since the faulty devices tend not to cooperate very well.
Running sudo ddrescue -d /dev/sdb backup.img backup.log for approximately 40 hours over many days rescued about 80% of the data.
Since at this point the percentage is growing by a very small amount and I’m impatient, let’s start looking at what the contents look like (we can assume that certain parts will simply not be recovered).
What we can do with a partially recovered image is to use another amazing tool called photorec, which will try its best to find data within the image that look like they could be files.
Running photorec backup.img on the partially recovered image yields around 691 images, which initially sounds really good, but looking at their contents reveals that around 650 of these are thumbnails (which all images on the camera have) and only 41 are actual photos, which is very depressing… ☹️.
This depression is further increased by grepping the binary image for strings that are in the format of the photos (N0000JPG) and getting 2281 hits, with the highest value being N6147JPG… meaning that, optimistically, we’ve recovered a whole 1.8% of images… 😢.
Welp, guess we’ll have to wait a little longer. 😴
How ddrescues your data
Since this will take a while, here is a short intermezzo on how ddrescue works.
ddrescue is written in a way that assumes you’re working with a faulty disk which has good blocks and bad blocks (i.e. some parts can be read from while others are broken).
It also assumes that reads from the bad sectors and excessive head movements all over the disk can cause further damage, so we want to avoid both as much as possible.
Under those constraints and with minor simplifications1, the algorithm works as follows:
- copying: read the disk from start to end (and reversed) multiple times, skipping bad / slow parts by skipping exponentially larger amounts of data until a good sector is found.
- trimming: read from both edges of the skipped parts until failure, determining the edges of the bad sectors (the ones from step (1) are very coarse).
- scraping: (repeatedly) sequentially read the bad sectors to scrape every last bit.
Doing it this way will extract a lot of good data fast and then work on the rest slowly, with diminishing returns. It will also not jump all over the disk, doing mostly sequential reads that don’t touch the bad sectors, which satisfies the assumptions we made about the input device.
Reading the SD card!
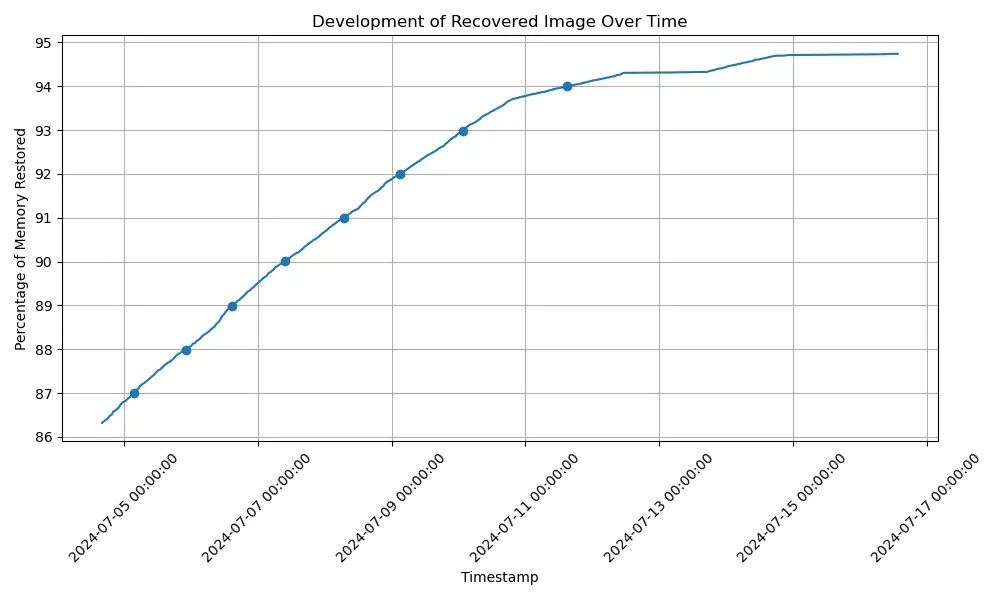
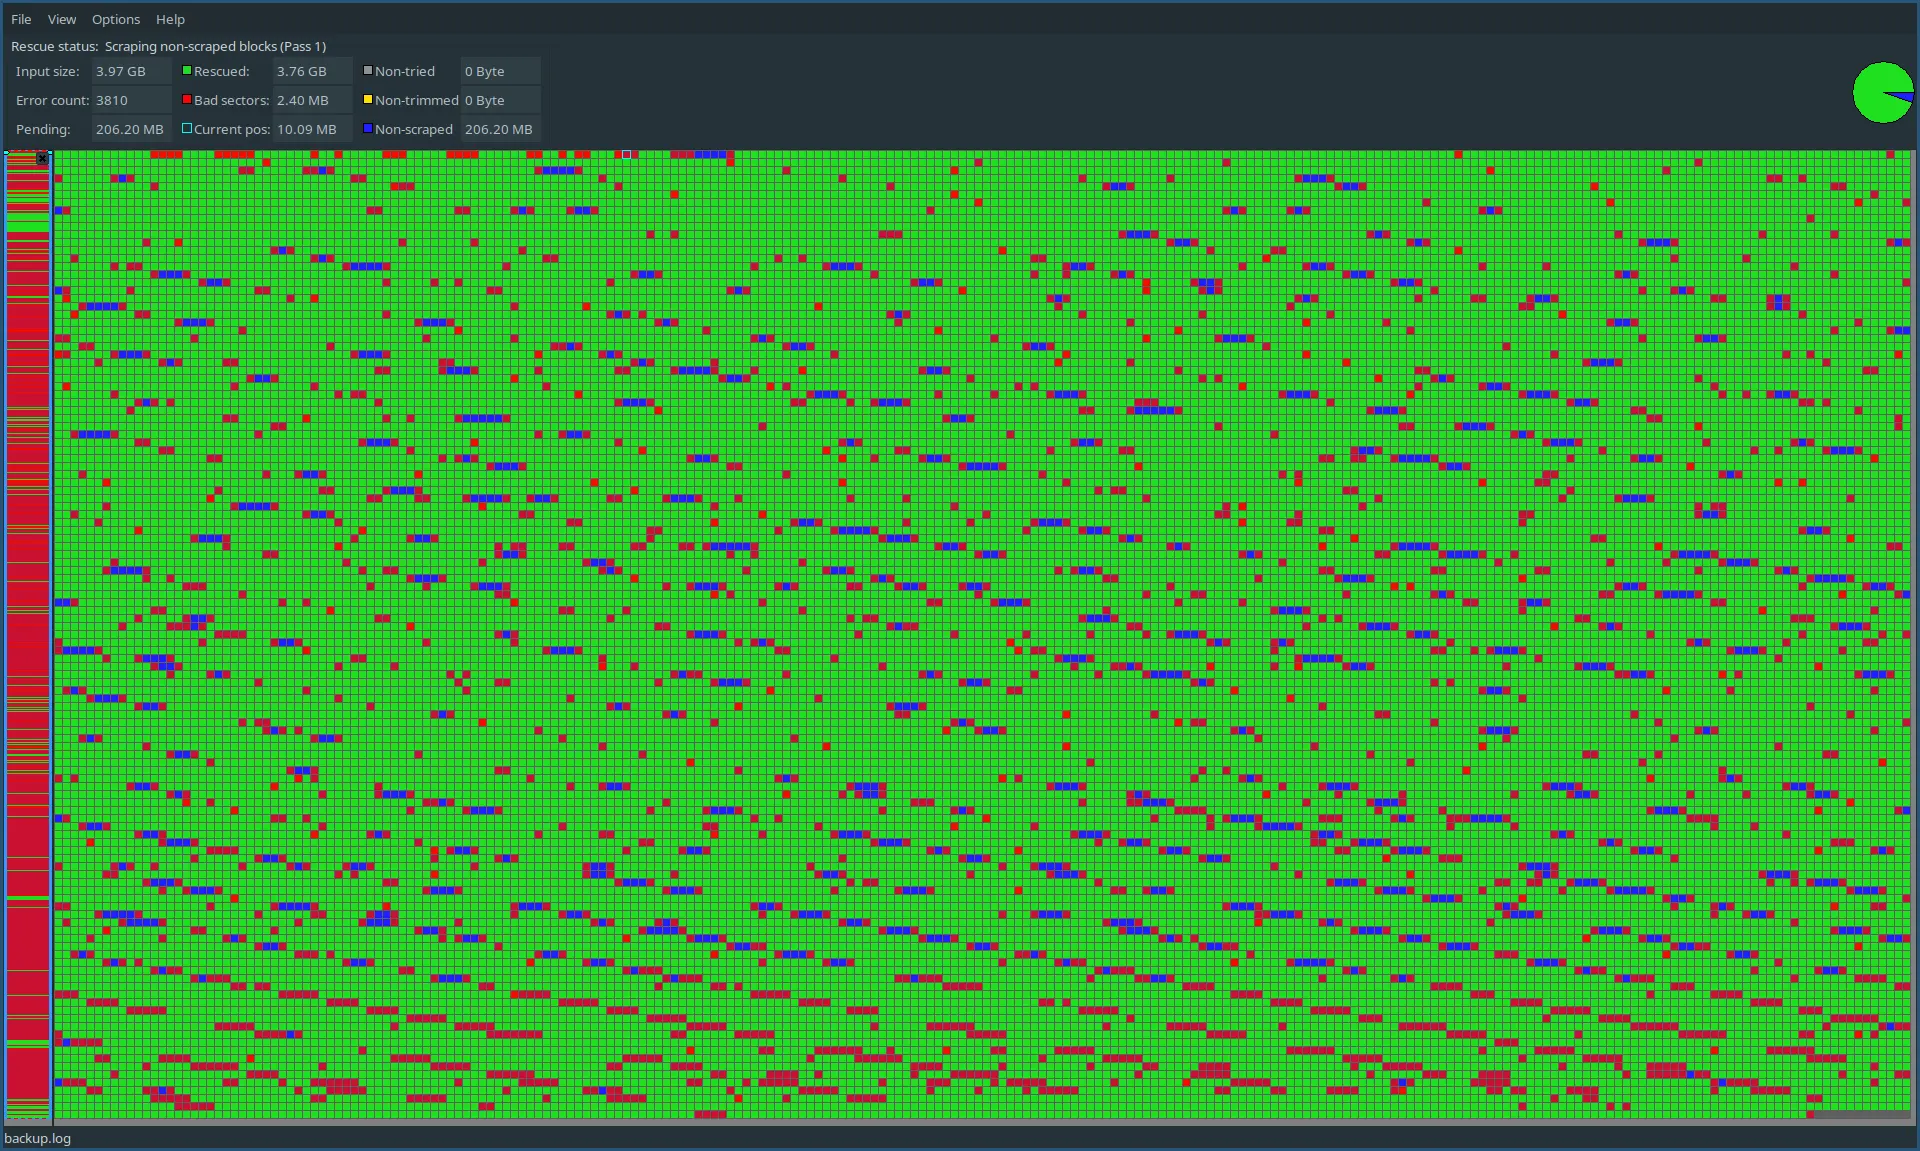
After ~300 hours of reading, the reading speed dropped to about 1 B/s we have managed to recover 94.5% of data, with the graph and recovered sector visualizations (using ddrescueview) looking like this:
Re-running photorec gives us 61 images and 700 thumbnails, which is… better… but still pretty depressing.
This is mainly due to how the recovered sectors are distributed – many of the images that could not be recovered contain corrupted bytes, which makes them broken.
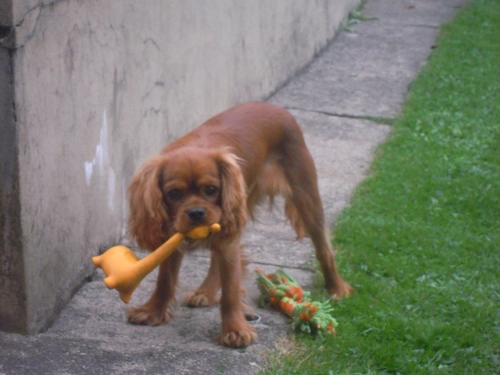
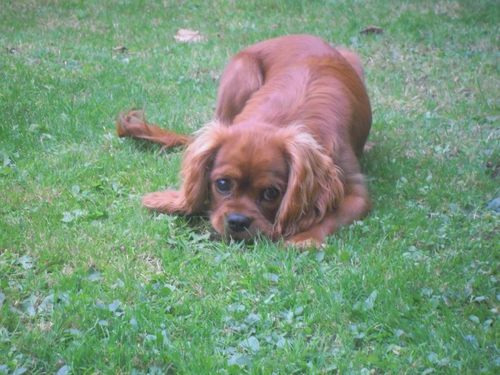
Looking at the positive side, that is still 61 high-quality images and 700 low-quality ones, instead of none whatsoever, which is something 🙂. Even more positive, since you made it to the end of this post, you get to look at pictures of a cute dog which would be otherwise lost forever 🎉!
The program also works with a log file which saves the progress and makes the description a little more complicated. It also has a number of flags that we’ll assume the defaults for, like no skipping bad sectors, number of retries, read size, etc… ↩︎